Multi-factor authentication contributes to increased security for all students and employees of the University of Iceland. See here how you Set up multi-factor authentication
Below is a step-by-step guide on how to sign in with multi-factor authentication.
1) When you have entered a page where you need UI authentication and are not on the university network, you need to use multi-factor authentication. This is an example showing the authentication process when logging into ugla.hi.is. Start by clicking on "Login":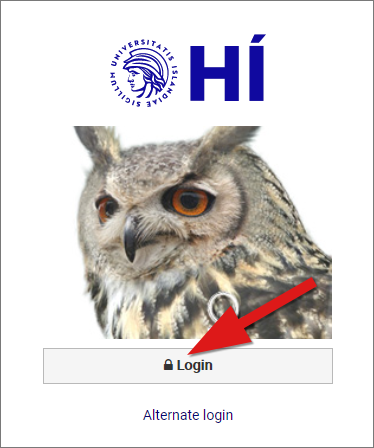
2) Type in your email address and click "Next":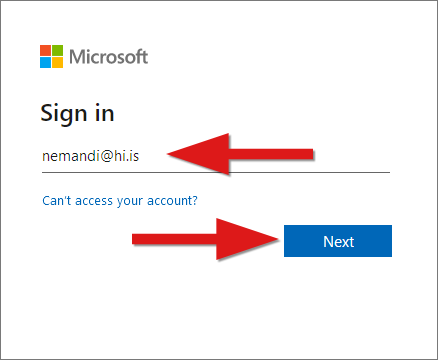
3) Type in your password and click "Sign in":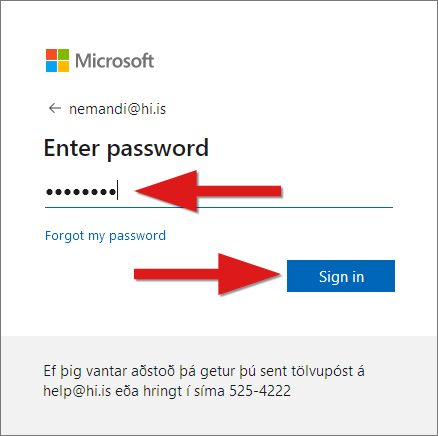
4) If you are using your own device, it is a good idea to click "Yes" here. If, on the other hand, you are on a public computer, it is better to click "No" here: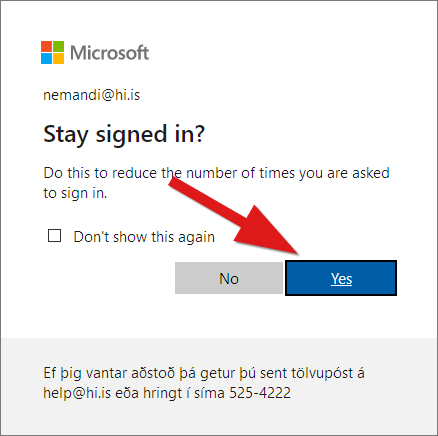
5) When you see this type of message on your screen, the site is waiting for you to authenticate with the Authenticator app (see next step):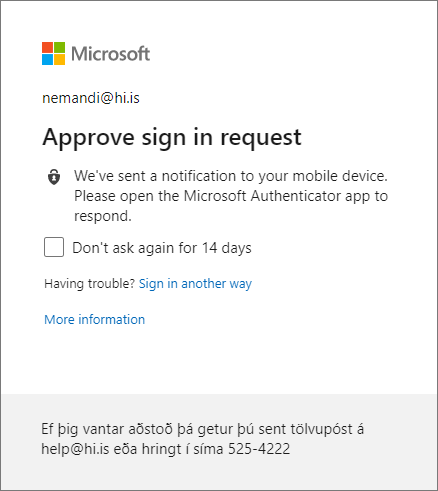
6) You should receive a message on your phone asking you to approve so you can continue to sign-in. It's a good idea to keep Authenticator open on your phone when this step is performed. It may vary from device to device what it looks like. Click "Approve":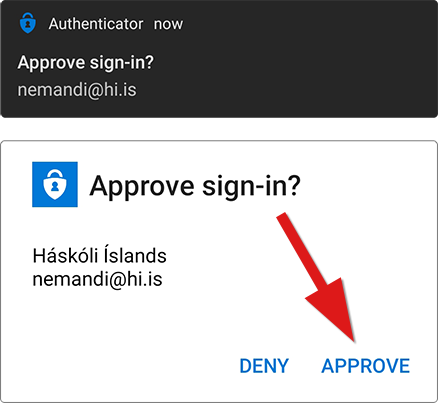
7) You may now be asked for your fingerprint or PIN: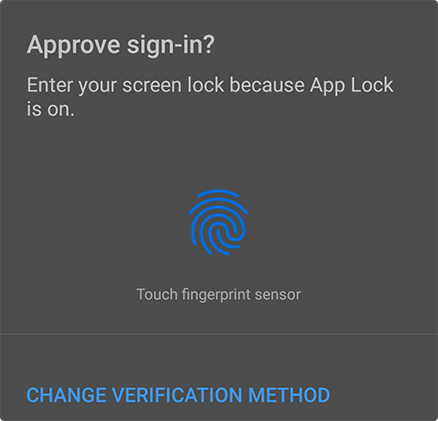
8) When this is done, you should be signed in to the site/system you were logging in to.

