Multi-factor authentication contributes to increased security for all students and employees of the University of Iceland.
The authentication is similar to electronic IDs (electronic certificates) and sends a notification to your phone to confirm login. Users do not have to confirm login when they are connected to the University network.
Below is a step-by-step guide on how to set up a multy-factor authentication.
If you already have multi-factor authentication installed then you can look at: Sign in with multi-factor authentication
1) Go to mfa.hi.is. NOTE that it is best to do this on a device other than the phone you are using for the two-factor authentication.
2) Type in your email address and click "Next":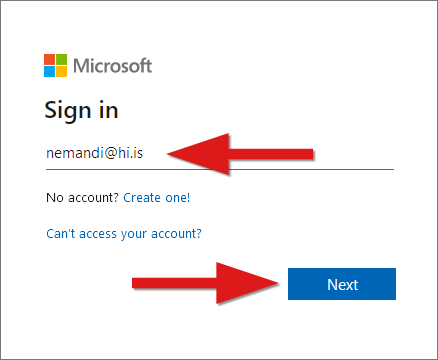
3) Type in your password and click "Sign in":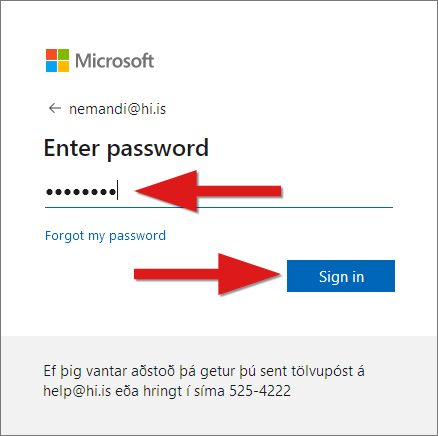
4) If you are using your own devicer, it is a good idea to click "Yes" here. If, on the other hand, you are on a public computer, it is better to click "No" here: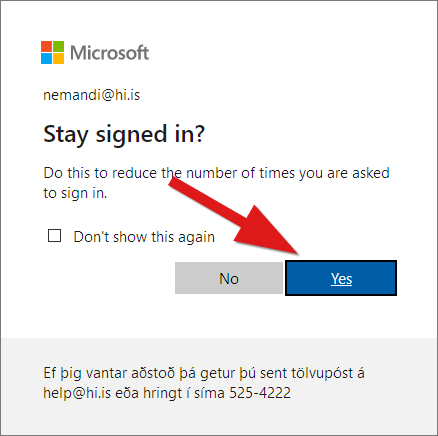
5) Here click "Next":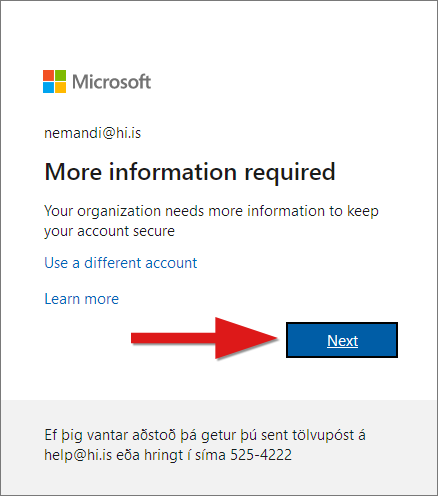
6) When the image below appears on the screen, open your phone, download and install Microsoft Authenticator.
Do not click "Next" until you have installed Microsoft Authenticator: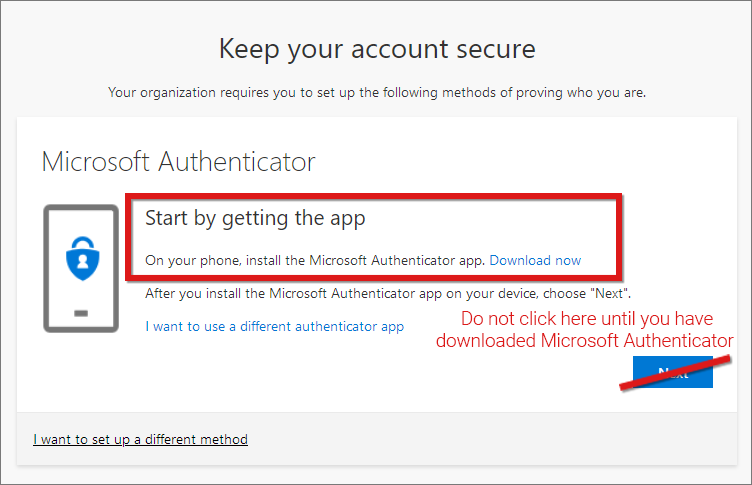
You can download the Microsoft Authenticator from App Store or Google Play:
You can use other authentication programs and methods, but we strongly recommend Microsoft Authenticator.
7) Open Microsoft Authenticator on your phone: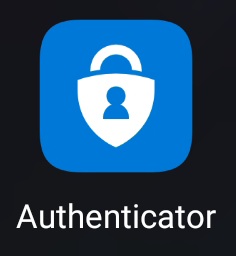
8) When you open Microsoft Authenticator on your phone for the first time, click "I agree". Allow notifications from the app if you are prompted: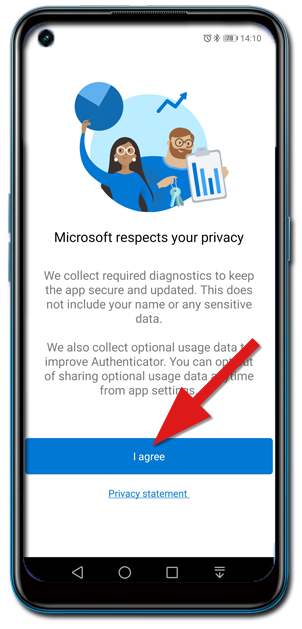
9) Now click "Next":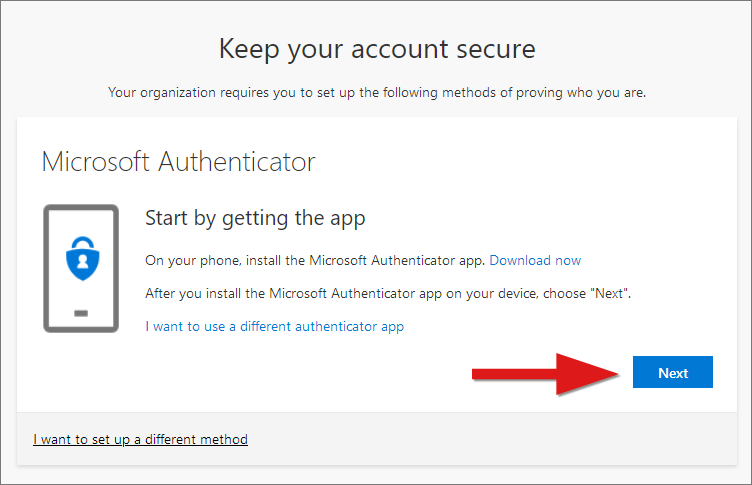
10) Click on "Next" again when this window appears: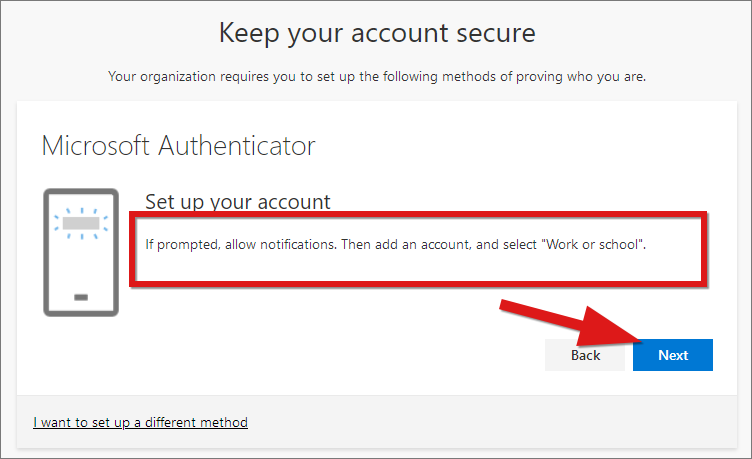
11) On your phone, select "Scan a QR code". Select "Work or school" if you are prompted to do so: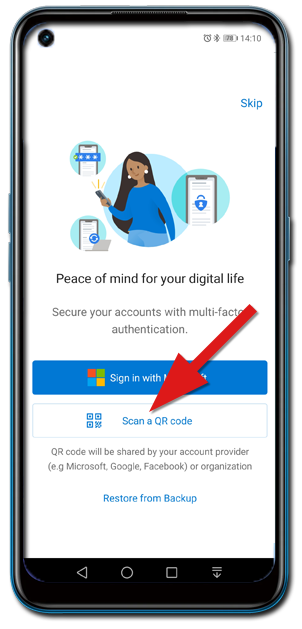
12) Your phone may now request access to the camera. Give permission and align the QR code in the middle of the screen to scan it. Then click "Next":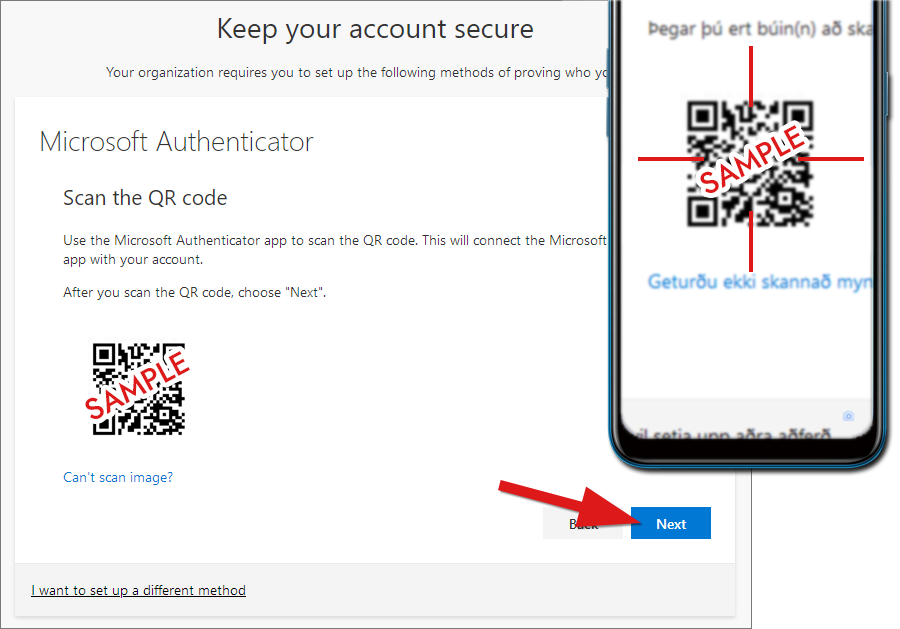
13) On your phone, you will see a window asking you to approve the sign-in. Press "Approve":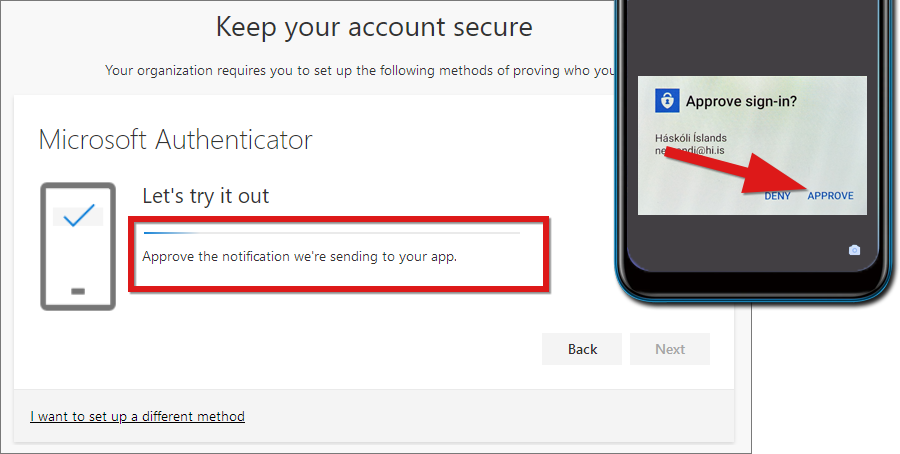
14) Notification approved. Click "Next":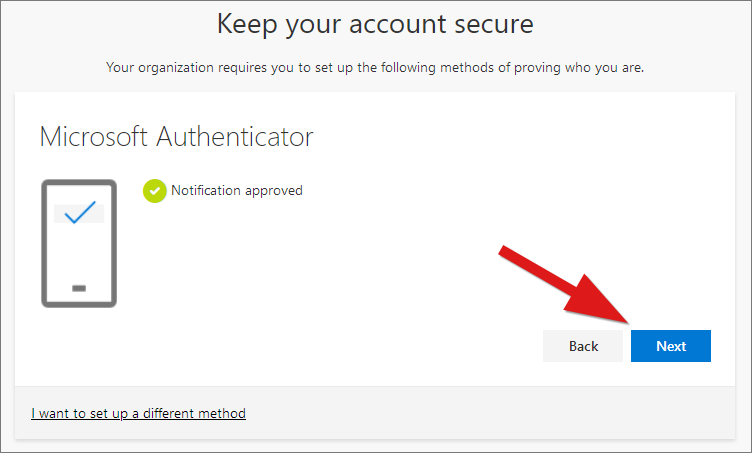
Now everything should be ready for multi-factor authentication sign-in. You should not have to repeat the steps above until you get a new phone.
From now on every time you sign in to UI's pages or systems and are outside the UI network, you are asked to accept the login on the phone. See more here: Sign in with multi-factor authentication


