Here you find instructions for creating an email signature in Outlook for Windows 10. You will find a video at the bottom of the page.
1) To create and attach a signature in Outlook, click "New Email":
2) Next, click "Signature" and select "Signatures....":
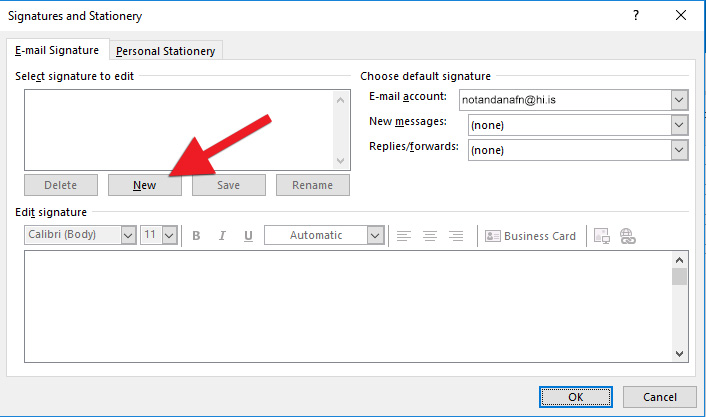
3) Click "New":
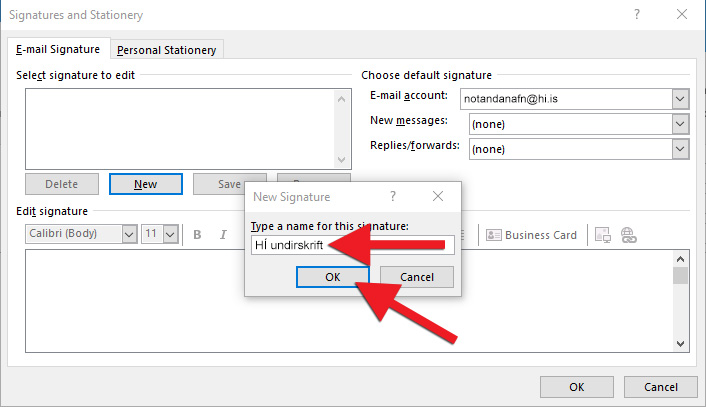
4) Give the signature a descriptive name and click "OK":
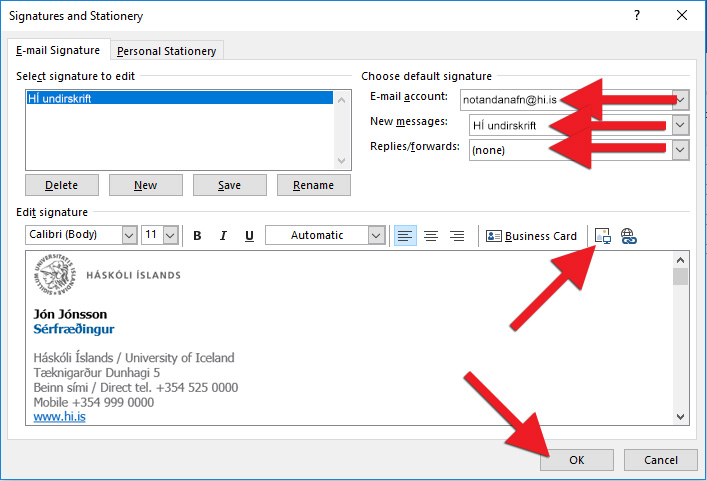
5) If you have more than one email account, select the email account for which the signature shall apply under "E-mail account". It is also necessary to choose if the signature appears in all new messages and/or replies and forwards. To do so, switch from "(none)" to the descriptive name of your signature in "New messages" and/or "Replies/forwards:". It is possible to have different signatures for different occasions. It can be good to have a simplified signature for "Replies/forwards:".
If "(none)" is selected in both fields, the signature will not automatically appear in the email. However, you can easily add it manually via the "Signature" button.
Type your signature into the large box. You can adjust the font and size to your liking. Click the image icon if you wish to add an image. Employees make sure you follow the standards stipulated by UI. Signature standards for UI staff can be found at the link. All you need to do is copy the standard and change your name, title, and so forth: UI design standard - signatures:
Click "OK" once the signature is finished:
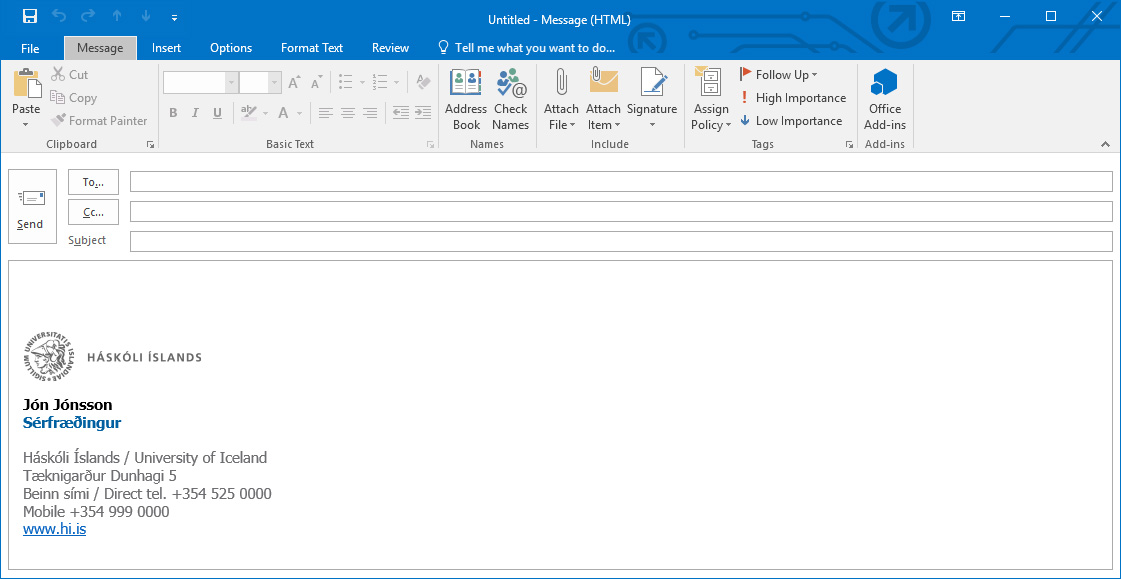
6) When you write your next email, the signature should appear automatically:
Video
The video below, provided by Microsoft, shows you how to create an email signature. Additional training videos on can be found here: Outlook video training

