Azure is a site where students can get Microsoft Project and other Microsoft software for free or with a discount. To use this service go to: https://azure.microsoft.com/en-us/free/students/
The instructions below show how to download and install Microsoft Project from Azure. The steps might change slightly if you choose other apps.
1) Go to https://azure.microsoft.com/en-us/free/students/ and click "Start free."

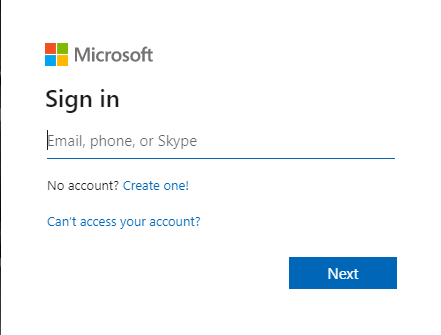
2) Login with your University email address.
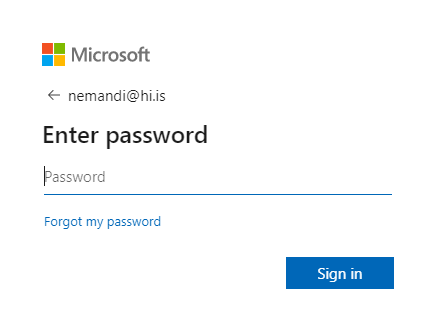
3) Input your University password.
4) Click "Yes" if you want to stay signed in or "No" if you do not.

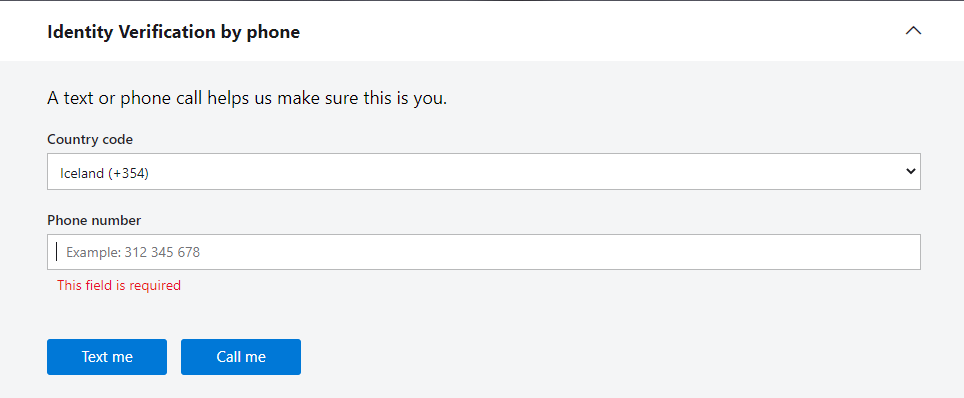
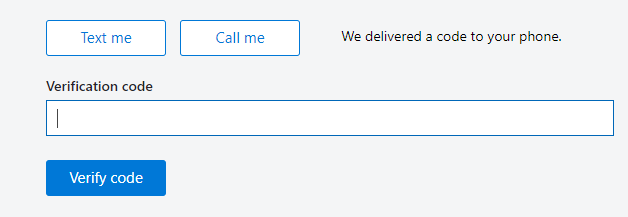
5) Here you need to input your phone number. Choose the country code and input your phone number. Then choose "Text me" or "Call me," whichever is better for you.
6) Input the verification code you got via message or phone call in step 5.
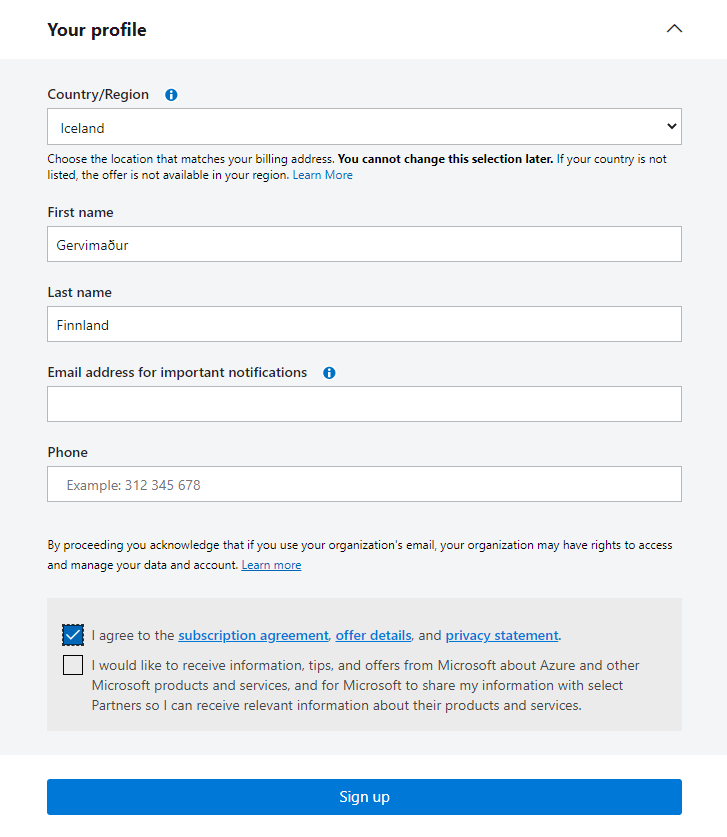
7) Fill out the form and check "I agree to the subscription agreement, offer details and privacy statement" and click "Sign up" to continue.
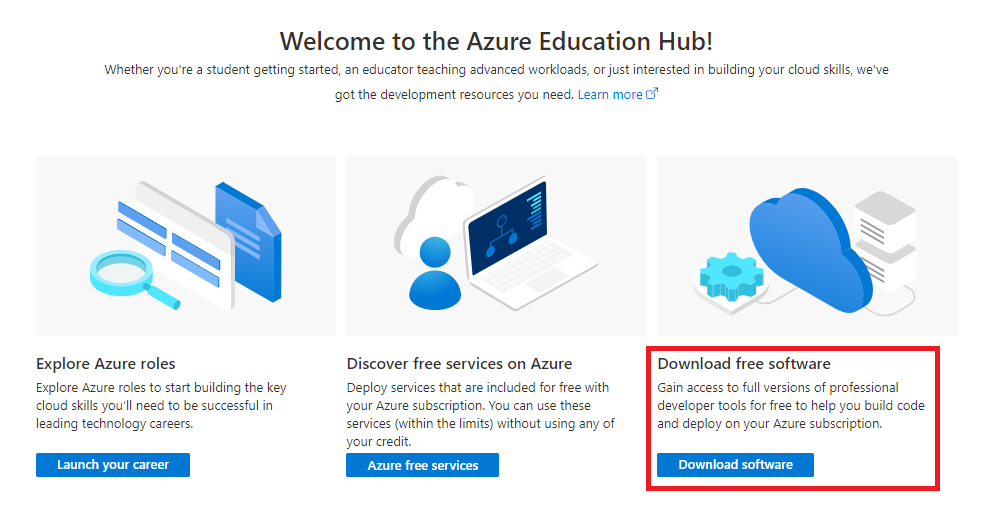
8) Click "Download software."
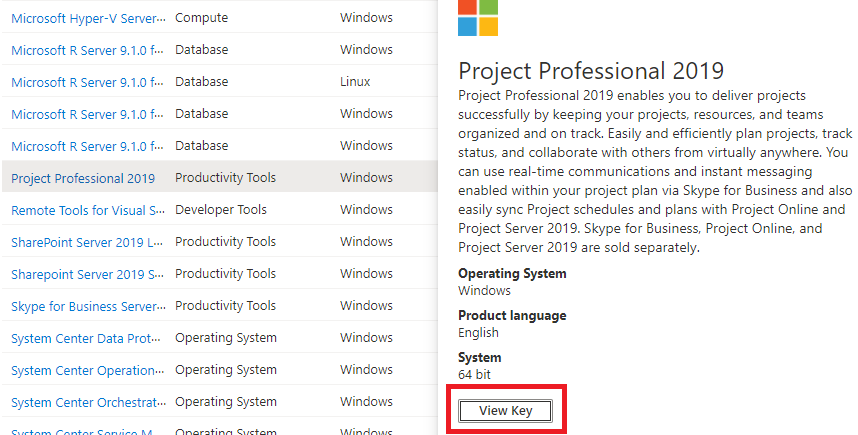
9) Here you can choose from a long list of apps.
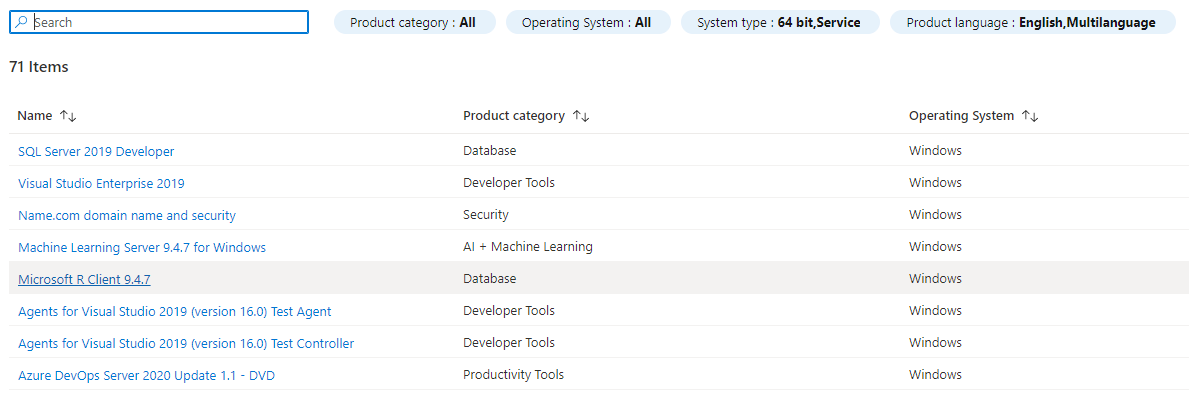
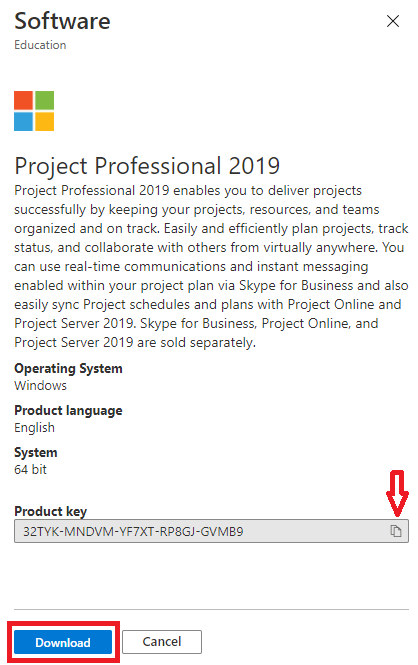
10) Find Project Professional in the list and click on it. Click "View Key" to get the product key for the app.
11) Copy the key and click "Download."
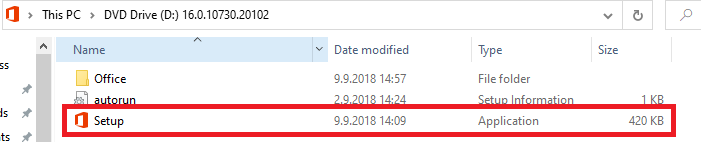
12) The file could take a while to download. Open it once it has downloaded.

13) Double click "Setup."
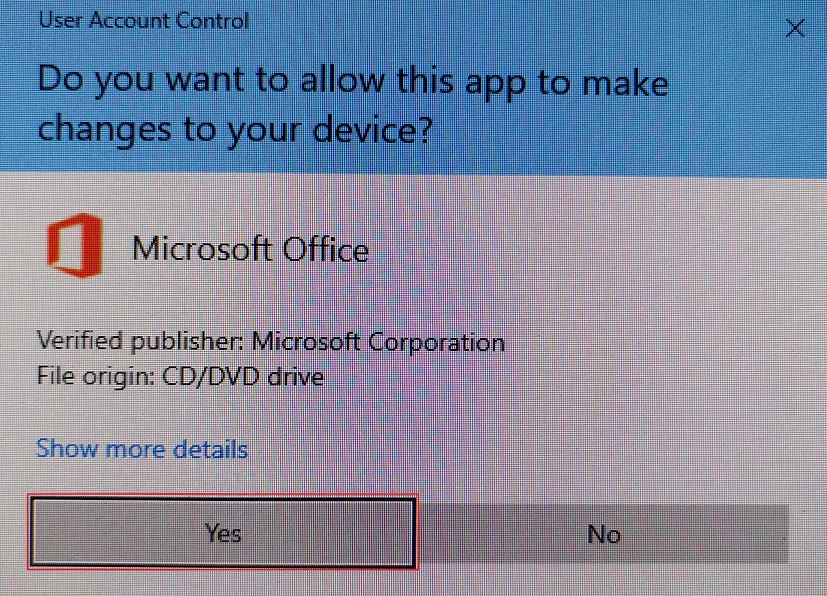
14) Click "Yes."
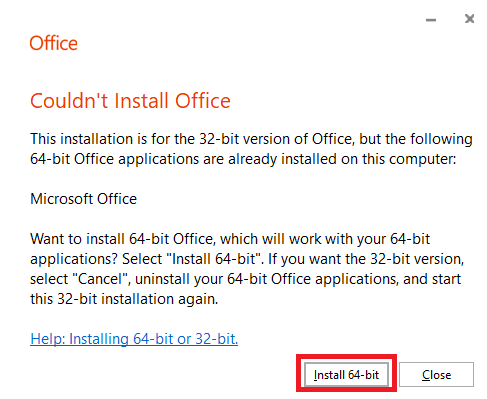
15) If this window pops up click "Install 64-bit."
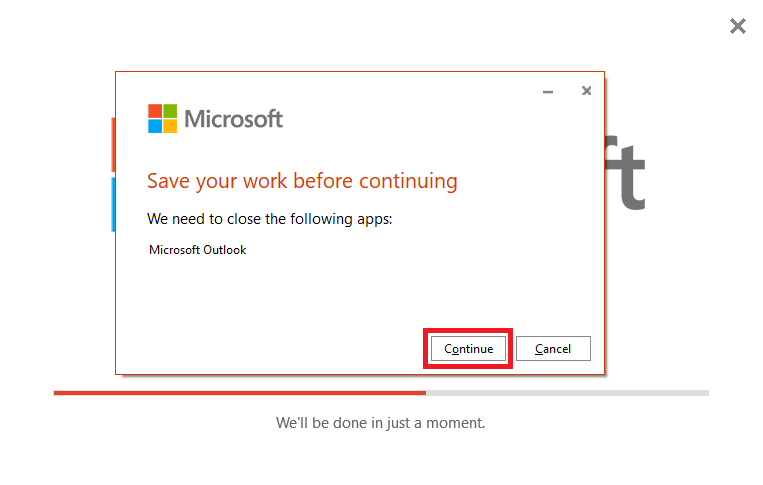
16) If this window pops up save what needs saving and click "Continue."
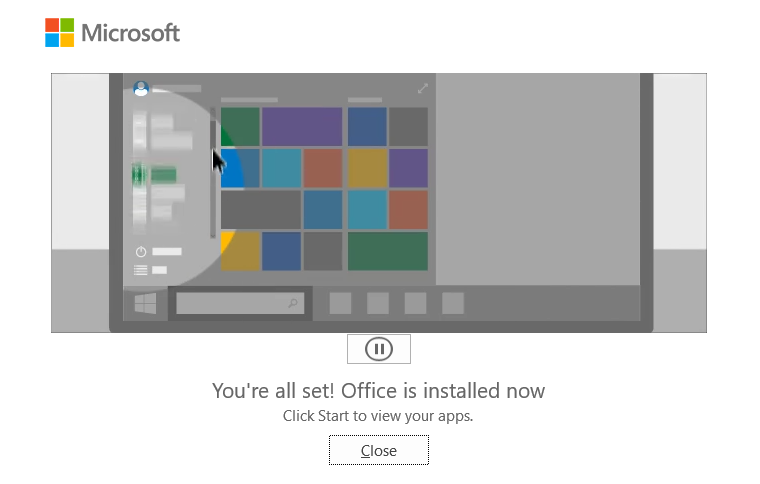
17) Wait for the installation to finish and click "Close" when this window appears.
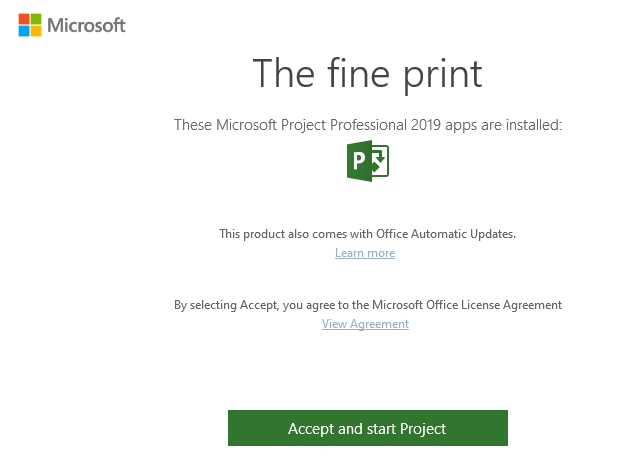
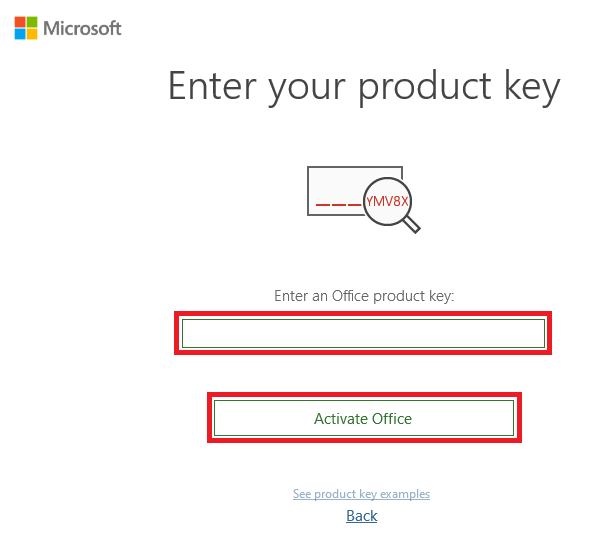
18) Put in the product key from step 11 and click "Activate Office."
19) Click "Accept and start Project."