Below we show how you invite guests outside of the University of Iceland to a Teams conference meeting and how the guest sees the invitiation. General Teams-conference instructions can be found here: Teams - video conferencing
1) You can initiate the meeting through Teams or Outlook. Here we show you how to book a meeting in Teams. Click on „Calendar“ and „New meeting“ if you want to book a meeting. You can also start a meeting directly by clicking „Meet now“ and invite people after the meeting has started.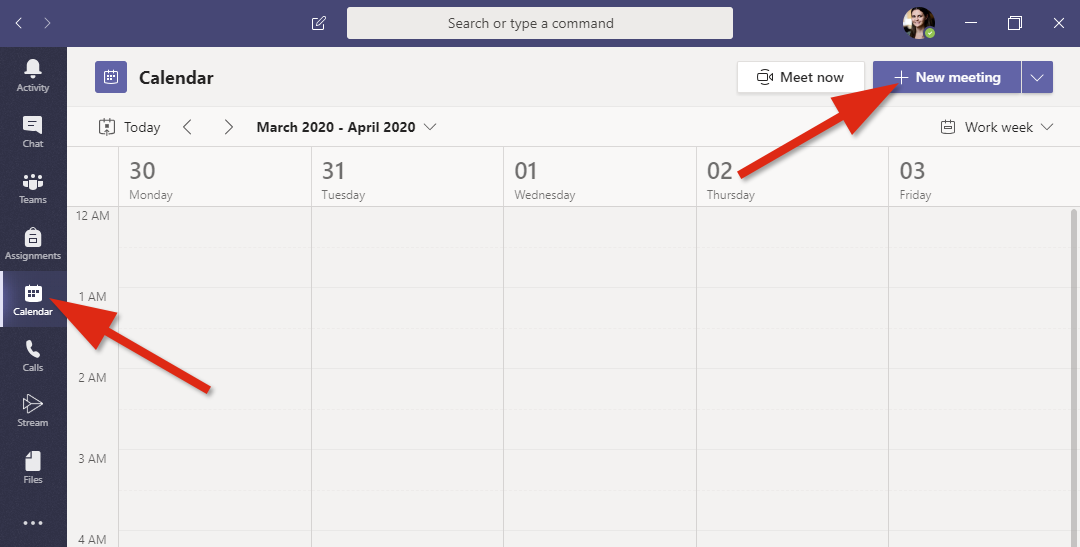
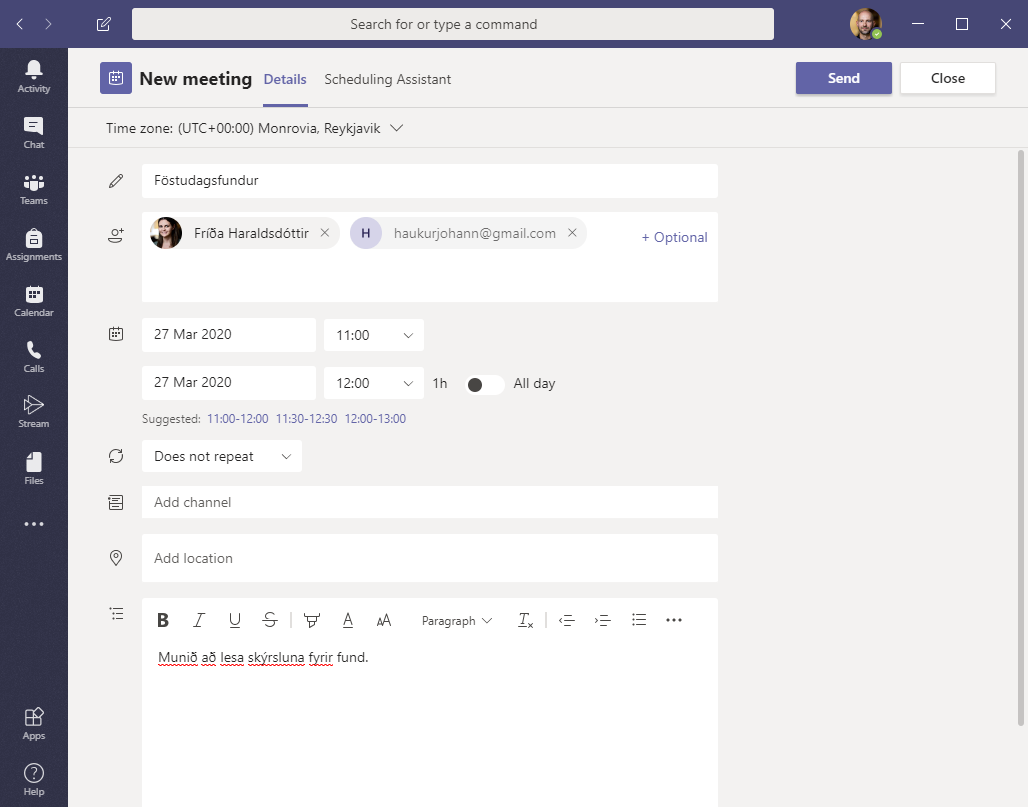
2) You get a meeting window.
- In Add title give the meeting a name.
-
In Add required attendess add names or emails of people you want to invite. If the person does not have a University email you should put their email and click the email address to invite it:

- Choose a date and time for the meeting, you can go to Scheduling Assistant above if you want to see when people are free
- Change Does not repeat if you want to repeat the meeting
- If you want to invite people from a specific Teams channel choose the whole channel under Add channel. The meeting invitation will appear on the channel but is also sent as an email to each person
- If the meeting is to take place in a meeting room add it under Add location. If this should only be a conference call from your computer adding a location is not needed
- Add a better description under Type details for this new meeting if needed
- Finally click Send to finish the meeting invitation
3) In „Scheduling Assistant“ you can see when members and meeting rooms are free. You can however not see when people outside the University are free or busy. Add people or meeting room under All attendees if you hadn't already done so in former steps. Choose a time that suits everyone, you can drag the column to change the time and widen it to lengthen the meeting time. Click „Send“ when everything is ready: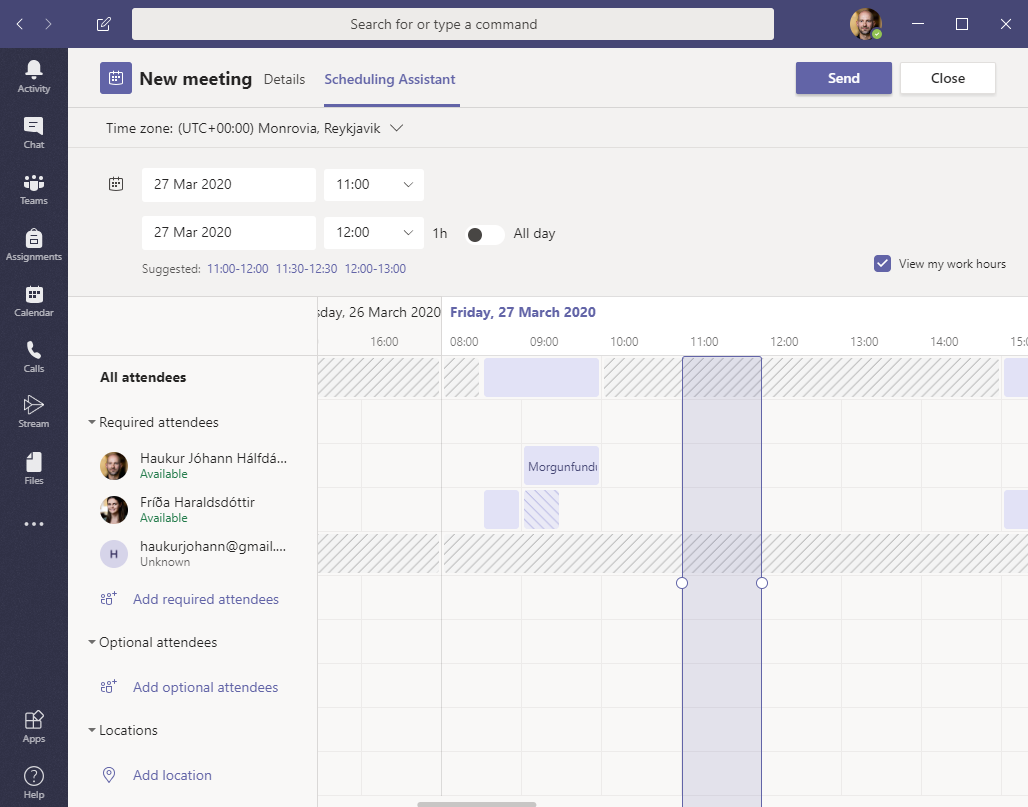
4) The guest sees the meeting invitation something like this in their mailbox. They click „Join Microsoft Teams Meeting“ when the meeting is about to start. They can click „Download“ on the invite.ics file to put the meeting on their calendar.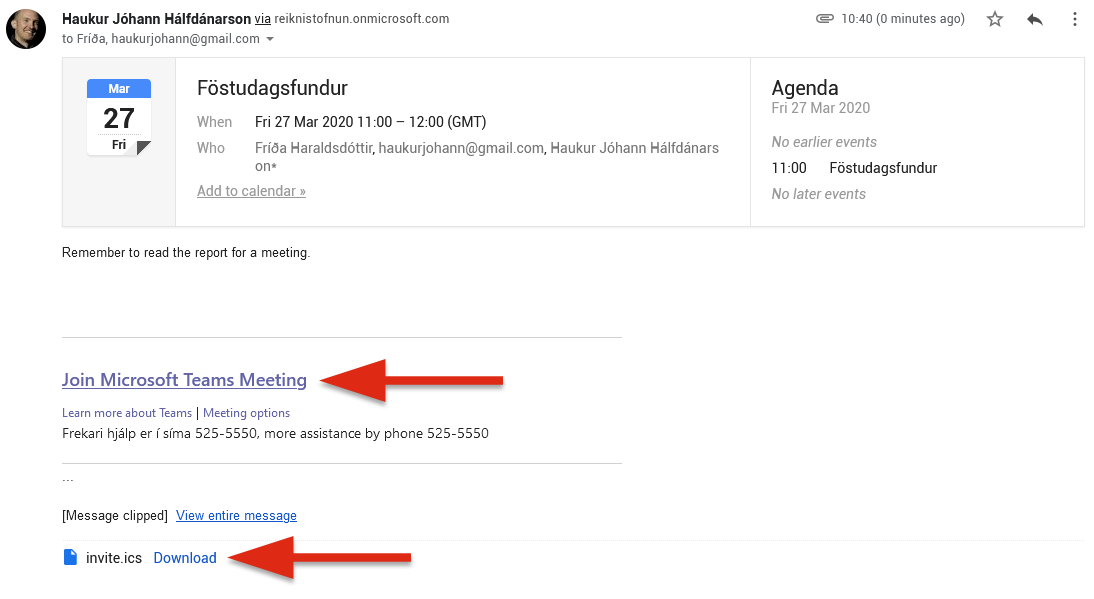
5) When the guest clicks „Join Microsoft Teams Meeting“ they get a window. They can choose three ways to enter the meeting.
- Download the Windows/MacOs app: Here they can get the Teams app. This is probably best for those that use Teams regularly
- Join on the web instead: Here they can join the meeting via browser. This is simplest for the user but they might need to give their browser permission to use the microphone and webcam
- Launch it now: If they already have the Teams app setup it's best to click here
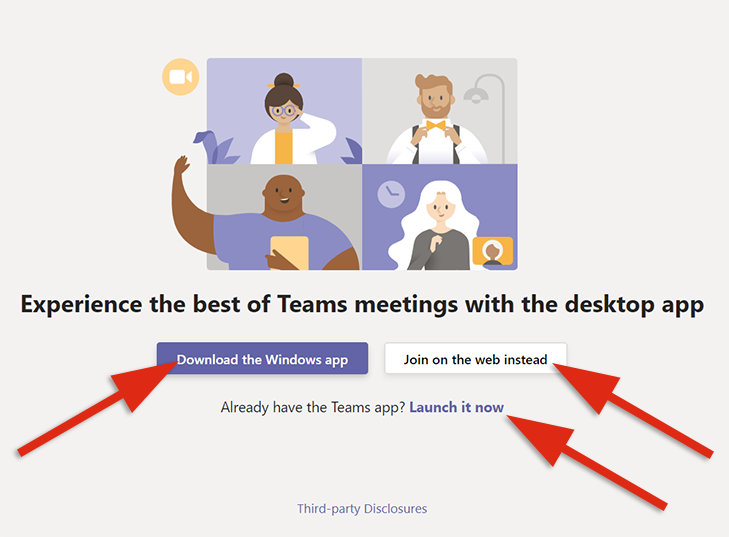
6) In this instance the guest chose to use a browser. They might need to allow the use of their webcam and microphone by clicking „Allow“: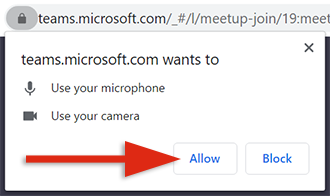
7) The guest will get this window. They can choose to enter the meeting with their webcam and/or microphone active. You can change these settings while the meeting is ongoing. Then click „Join now“: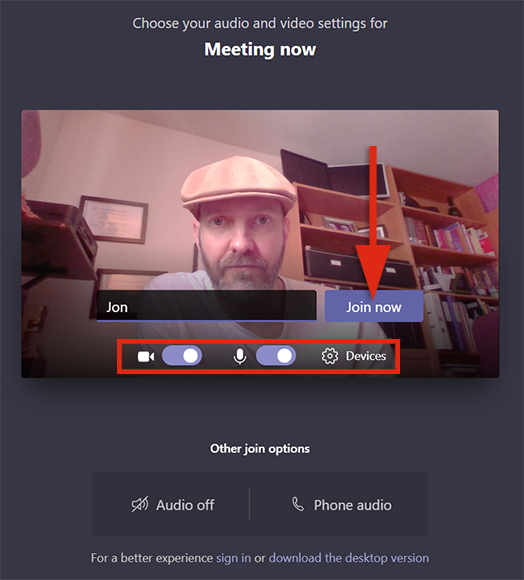
8) Since this is a guest from outside the University the meeting host needs to allow the guest to enter the meeting. As soon as the guest clicks „Join now“ they get this message: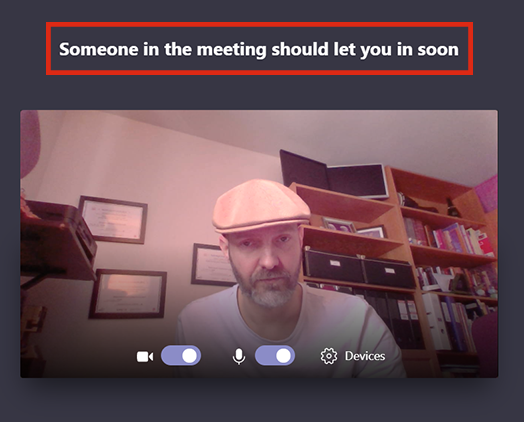
9) The meeting host gets a message to admit the guest to the meeting. Click „Admit“ to allow the guest to enter: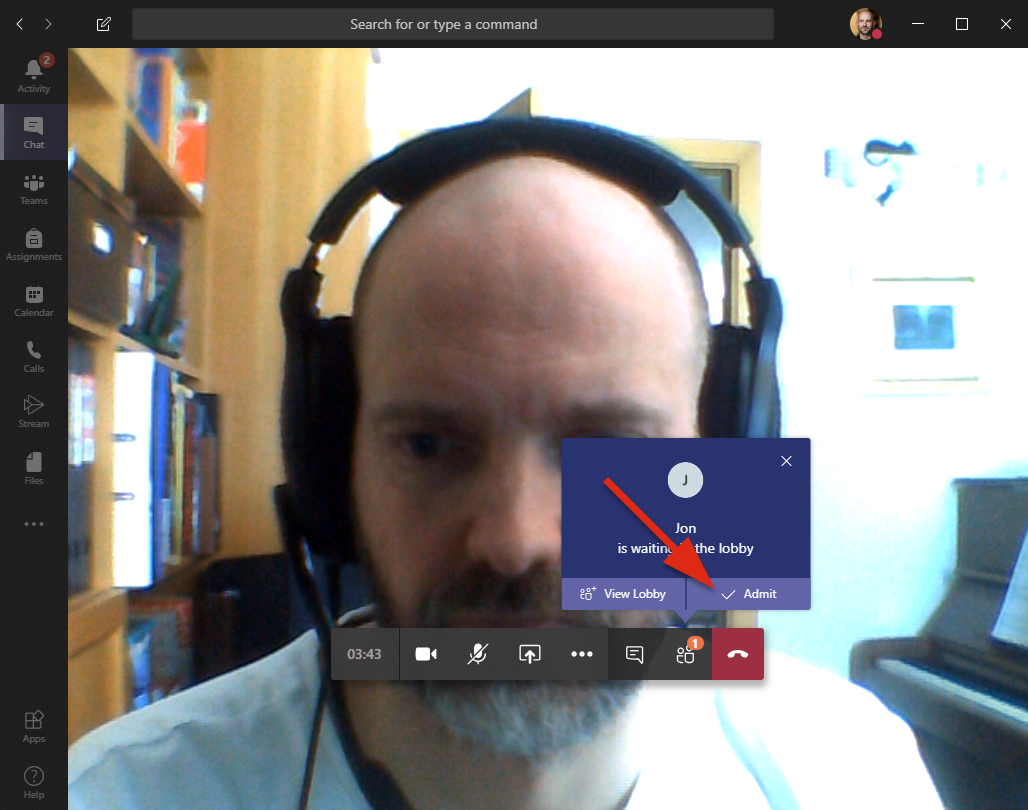
10) If you want to add a guest to the meeting after it has started click the „Show participants“ icon: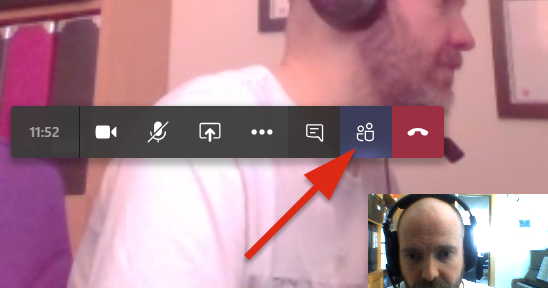
11) Here you invite to the meeting as shown in step 2. You can add University users or outside guests: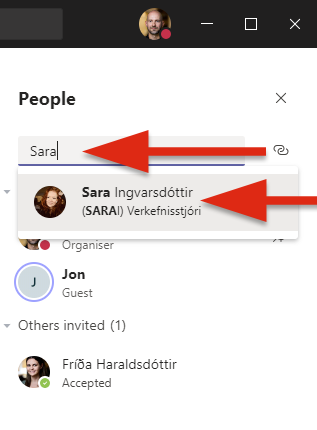
Here you can find more information about conference calls in Teams: Teams - conference calls

