
If the automatic installation for MacOS does not work you can set eduroam up manually as shown below. We recommend trying the automatic installation first: Eduroam for MacOS.
Root certificate setup:
First you need to get the HÍ root certificate on the computer.
1) Push the button below to get the root certificate:
2) Double-click on the file in Downloads:
3) Choose "System" and click "Add":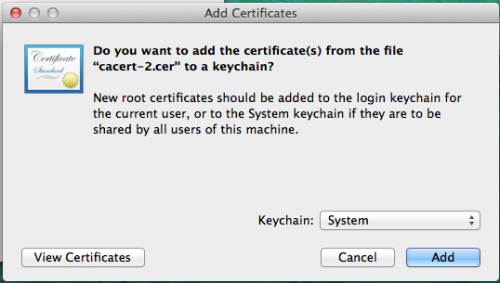
4) You might be asked to trust the certificate. Click "Always Trust":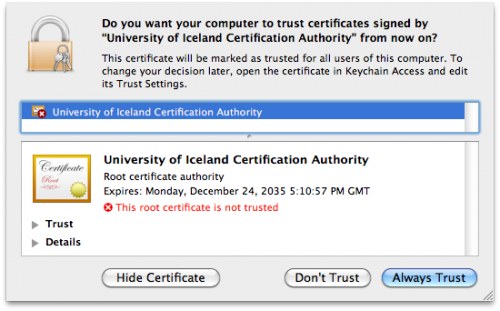
5) You are asked to allow keychain access, put your password to allow: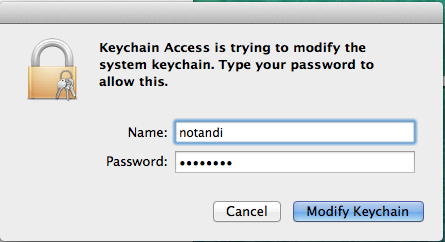
Eduroam setup:
6) Now the certificate should be installed. Next you need to setup the connection. Go to the network icon in the top right corner and click "Open Network Preferences":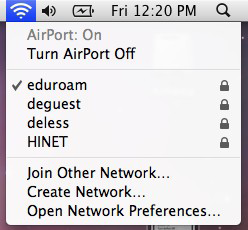
7) Choose Airport or WiFi from the list and click "Advanced":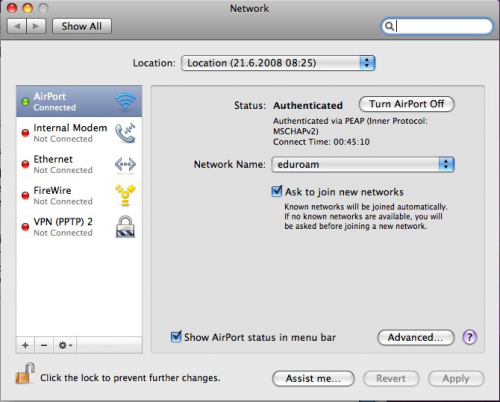
8) Choose the 802.1X tap. Click the plus and "Add User Profile":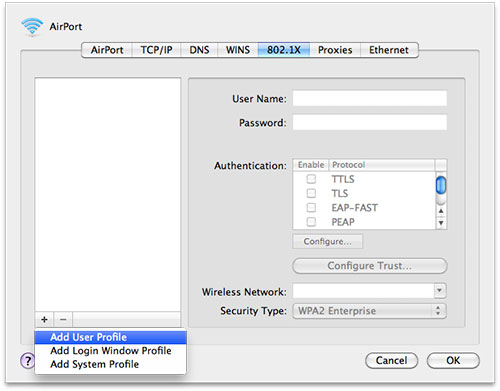
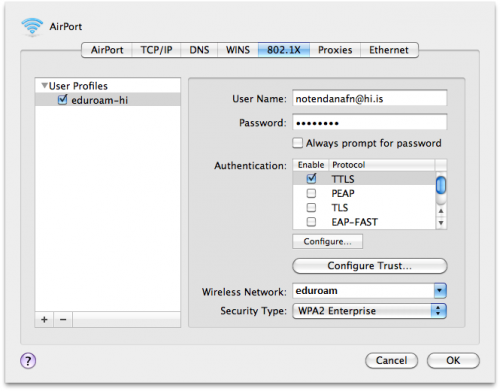
9)
- Change the name of the profile to eduroam-hi.
- Put your HI e-mail address in "User Name" (don't forget @hi.is).
- Put your password in "Password".
- Tick "TTLS".
- Write "eduroam" in "Wireless Network".
- Security type should be "WPA2 Enterprise":
10) Click "Configure..." under the TTLS tick. There should be MSCHAPv2 in TTLS Inner Authentication and in Outer Identity put your username. Click "OK":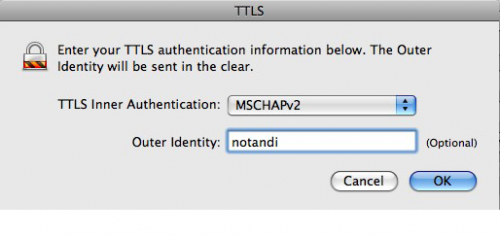
11) Click "Configure Trust..." (step 9) and get this Certificates window. Click the plus and choose "Select Certificate From Keychain":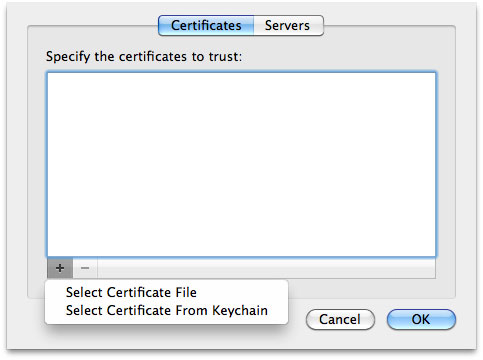
12) Choose "University of Iceland Certification Authority" from the list and click "OK":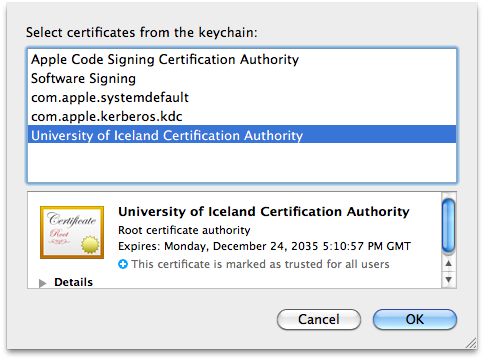
13) You should see the certificate. Click "OK":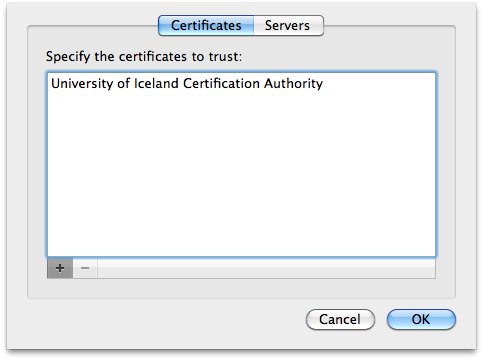
14) Click "OK". Now you should connect to eduroam. If eduroam doesn't connect by itself you might need to go to the network icon in the upper right corner and choose "eduroam" from the list, see step 6 here: Eduroam for MacOS. If you're asked for a username and password, remember to put your whole e-mail address and your password.
Please go to the IT Help Desk on Háskólatorg or Hamar if you have problems connecting after installation or if you are not able to finish the installation.