Many staff members have there own workstation located in an office. Many of those computers need to have a fixed IP-address and this is how you insert it for Windows 10.
1) Open "Network and Sharing Center". You can do that by right-clicking on the network icon at the bottom right corner of the taskbar: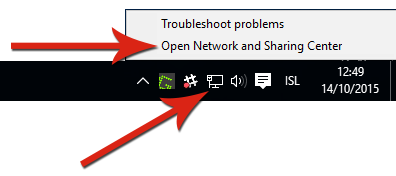
2) Click "Change adapter settings" on the left side of Network and Sharing Center: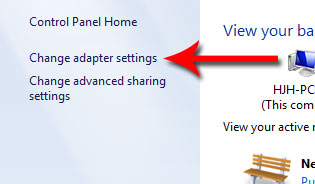
3) Right click "Local Area Connection" and choose "Properties":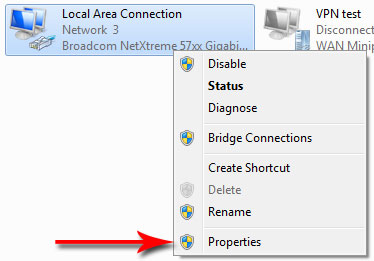
4) Click "Internet Protocol Version 4" and Properties: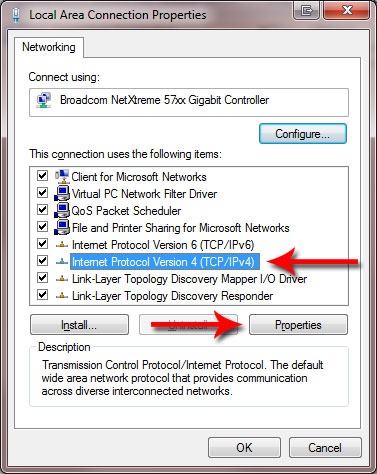
5) You put the IP address in the window below. Check “Use the following IP address” and “Use the following DNS server address”.
You have probably received an IP address by now if you have applied for one. Where is says IP address you type the address you were given.
Then you need to fill Subnet mask (usually 255.255.255.0) and Default gateway (usually 130.208.same as for the third area in the IP address.254).
For Preferred DNS server you type 130.208.165.82 and for Alternate server 130.208.165.87: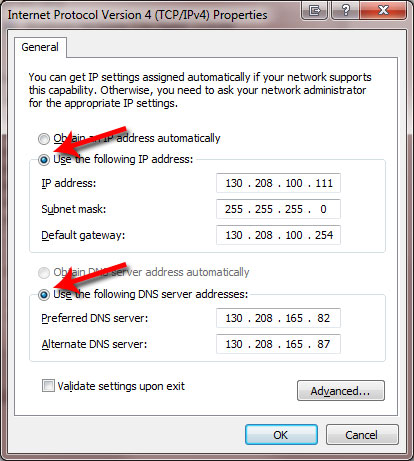
6) Click OK and OK again and the net card should be ready by now with a fixed IP address.

