Below are instructions on how to decompress ZIP files with Windows 7
Note! The computer might have another program installed for decompressing ZIP files, in that case these instructions don’t refer.
1) The decompressing process usually starts by downloading a ZIP file from the internet. It has .zip in the ending. Choose to “Save” the file. The first step might differ slightly depending on browsers.
If you have already downloaded a .zip file you should go straight to step 5:
2) In the window below you can select a location for saving the file. Pick the location and click “Save”. (Some browsers save the file directly to a folder in advanced):
3) It could take a while downloading a file if it is big. After finishing downloading click “Open folder”:
4) The security window below might appear, in that case click “Allow”:
5) In this step you should be in the ZIP file but there is yet to decompress it in order to use its content. At the bottom of the window you can see the file is not a regular file but a ZIP file. Click “Extract all files”: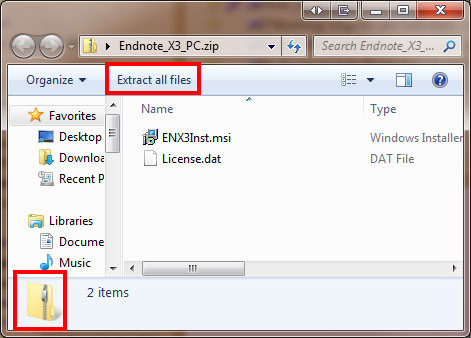
6) Select a location for decompressing the contents of the file. Be careful you know where the folder ends so you can find it and open it. Click “Browse” in order to select another destination than already chosen: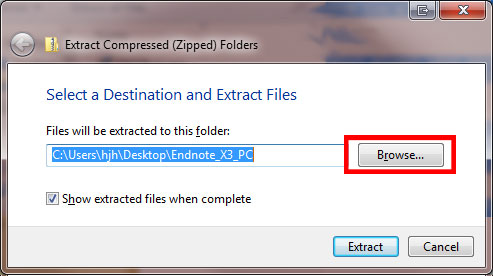
7) Select “Desktop” (you can pick any location, just make sure you remember it) click “Make New Folder”. Give the folder a name, in this case it is “Endnote” describing the program downloaded, and click “OK”: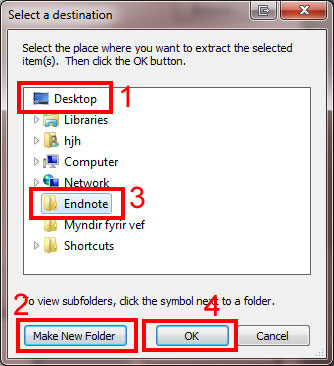
8) The window below informs you which location was selected (in this case Desktop\Endnote). Click “Extract”, it is advisable to check “Show extracted files when complete”: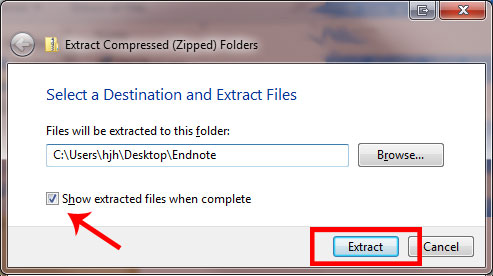
9) The next window appearing could stay open for a while, it depends on the size of the file: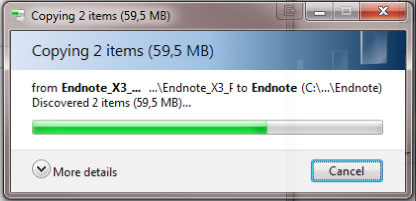
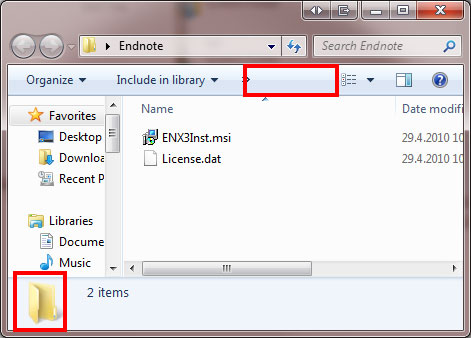
10) Below you see how things should look like after decompressing the file. The window looks similar to the one in step 5 except it doesn’t say “Extract all files”. The folder at the bottom of the window is now a regular folder instead of a ZIP folder and you should be able work with the files now: