Below are instructions for booking a room and people for a meeting and making sure that everyone is free at the same time.
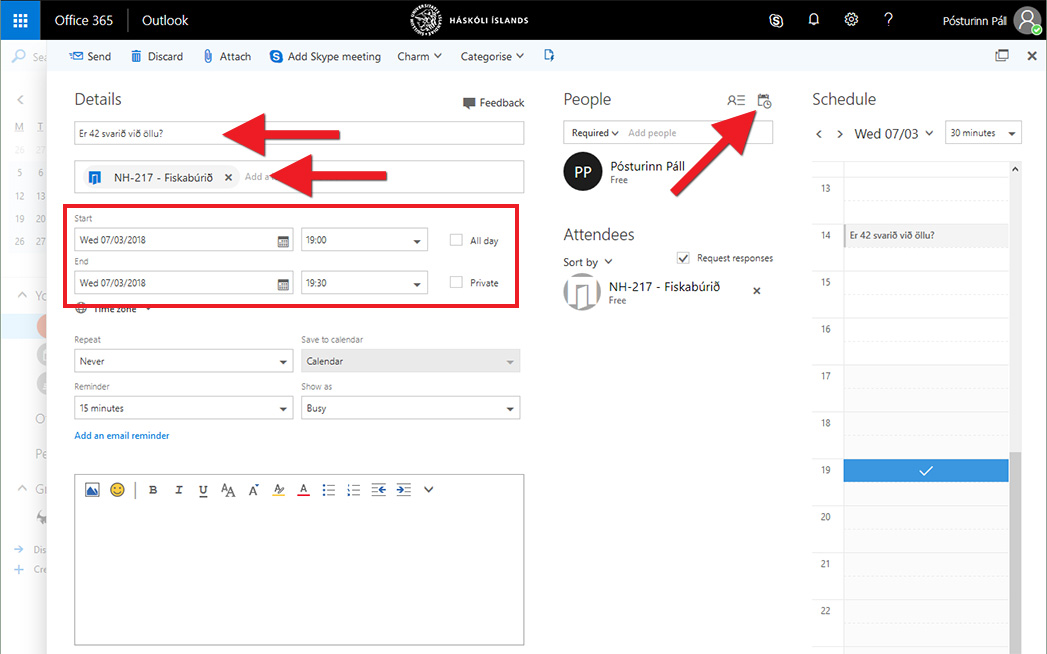
1) It is best to start by giving the meeting a name and choosing a provisional time and meeting room. Then click the "Scheduling Assistant" button in the top right:
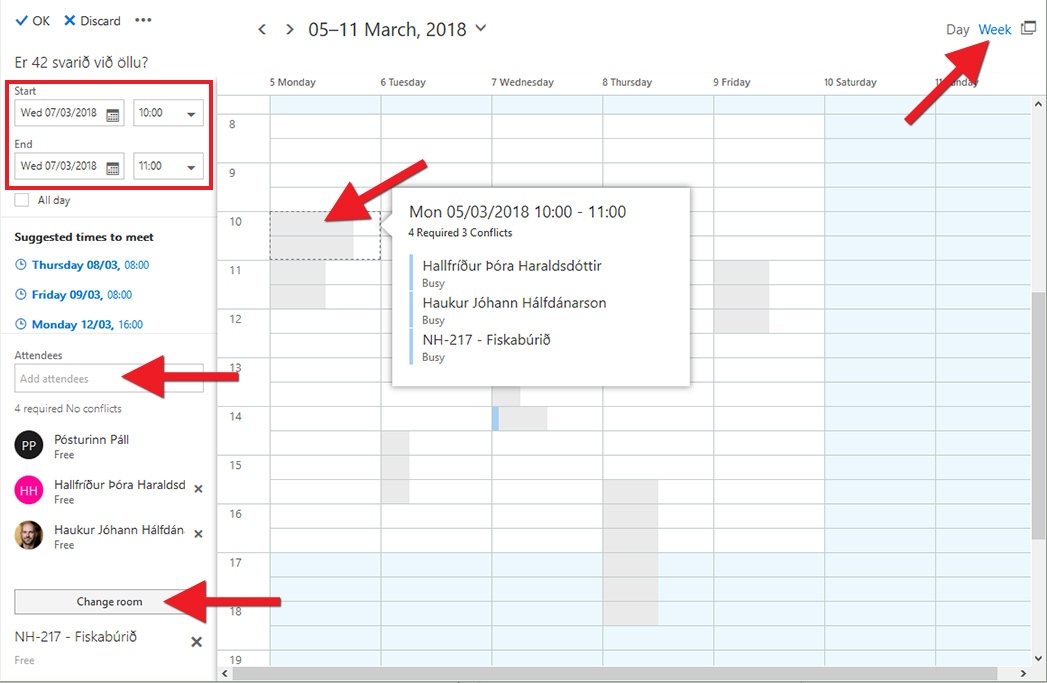
2) There are two displays to choose between. Here you can see the week display. Click "Week" to select this. Add attendees by typing their names in the field "Add attendees". The list will narrow down as you type. You can also change the meeting room by clicking "Change room". If you hover the cursor over a grey field, which means that someone is busy at that time, you can see who exactly is busy. Click on a white field to choose a time when everyone is free:
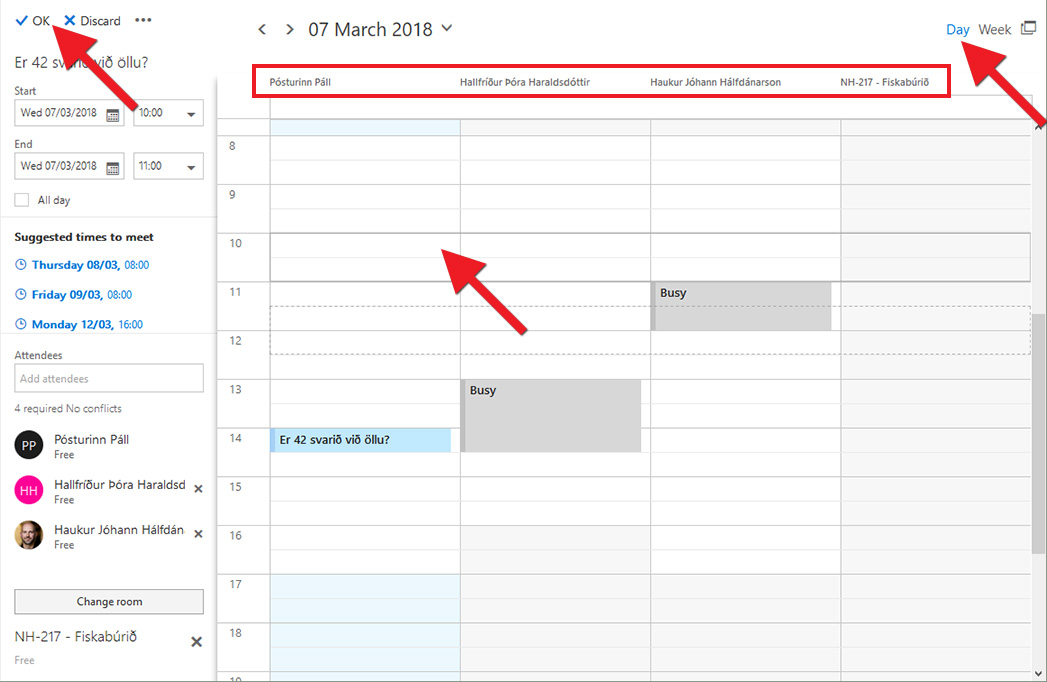
3) It might be easier to display just one day. Click on "Day" to do this. Here you can see the names of the attendees at the top and who is busy at what times on this day. Click a field that is completely white to select a time when everyone is free (note that the meeting room may have a slightly darker background, but still be free). Click "OK" once you have chosen a time that works for everyone:
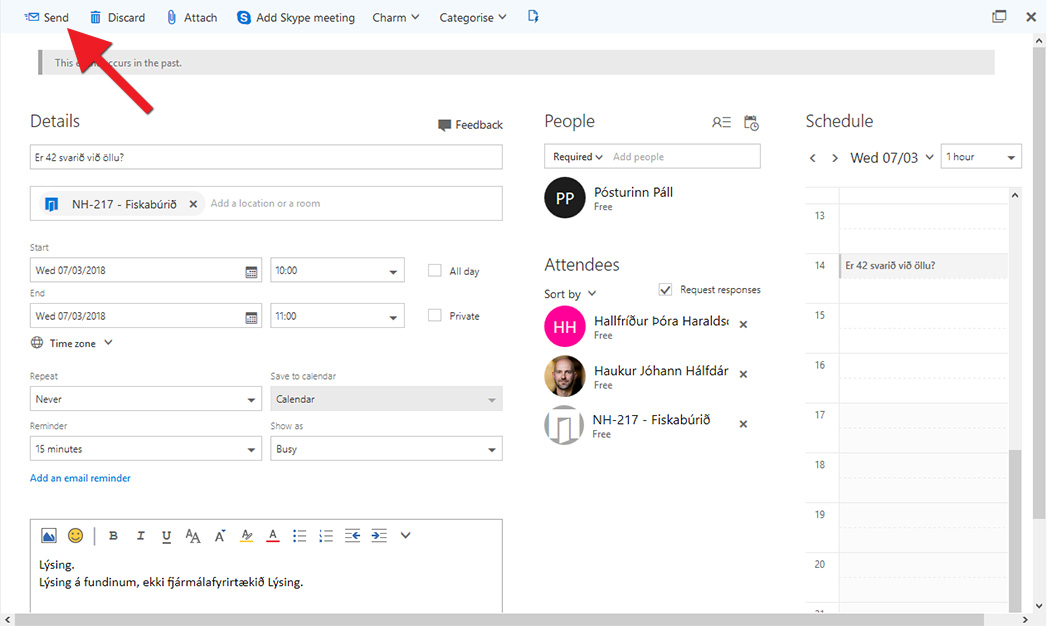
4) Click „Send“ when everything is ready:

