Calendar view
1) You can select how many days you see in the calendar. Click on the icon in the top right:
2) Here you can choose to view the calendar as an agenda, or to view one or three days at once:
Visible calendars and calendar sharing
You can choose which calendars are visible and adjust settings for each calendar, such as sharing a calendar with others.
1) Tap the 'Hamburger' icon (three horizontal lines) in the top left: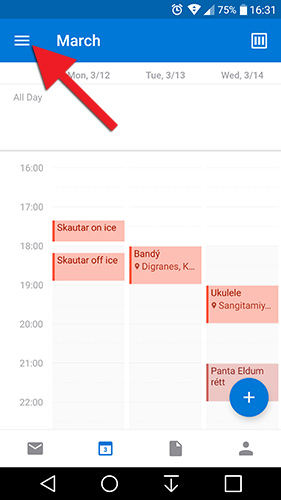
2) Tick and untick the calendars you want to have visible/invisible in your calendar view. If you want to go to the settings for a specific calendar, tap the gear wheel icon to the right of that calendar. In this example, a Google account is also connected to Outlook, making it possible to also view calendars from this account. Tap the gear wheel icon to the right of a calendar: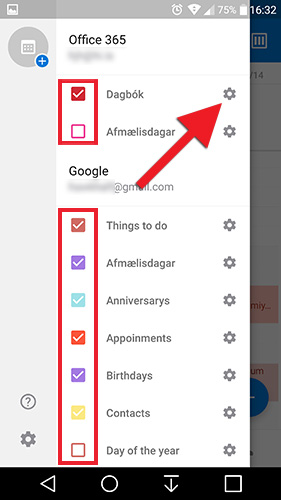
3) Here you can, for example, select a colour for the calendar and share it with others. To do so, tap "Add people". Then you can select whether the recipient can only view the calendar or whether they can also add events to the calendar, and so forth: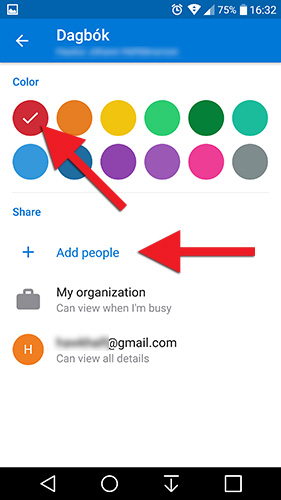
Notifications and other settings for the calendar app as a whole
1) Tap the 'Hamburger' icon (three horizontal lines) in the top left:
2) Tap the gear wheel icon in the bottom left: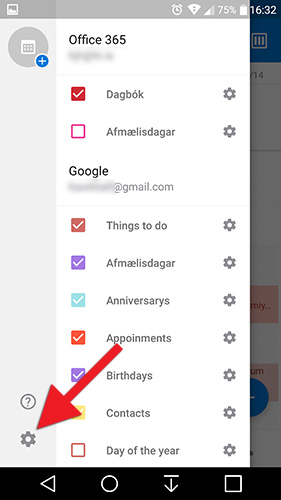
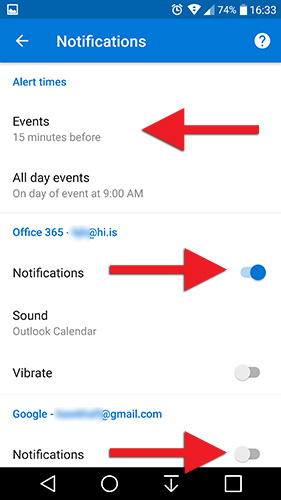
3) Here you can adjust various Outlook settings. Scroll down the list to the calendar settings. Here you can select when to receive notifications, which calendar is selected by default when a new event is created (this can always be changed when setting up a new event), and what day of the week the week shall start in the calendar. In the current example, we select "Notifications":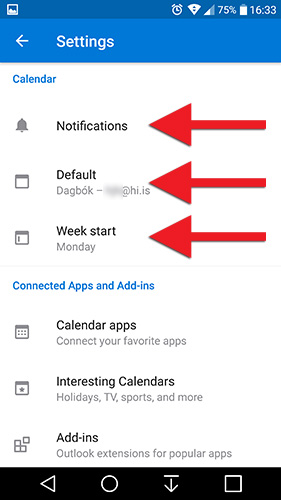
4)Tap "Events" to select when to receive notifications about an event start. You can also choose whether or not to receive notifications from this account. In our example, we selected to receive notifications from the UI account but not the Google account.