1) In a web browser, the same process is used for setting up events and meetings. Start by opening the Calendar and selecting "New" and then "Calendar event":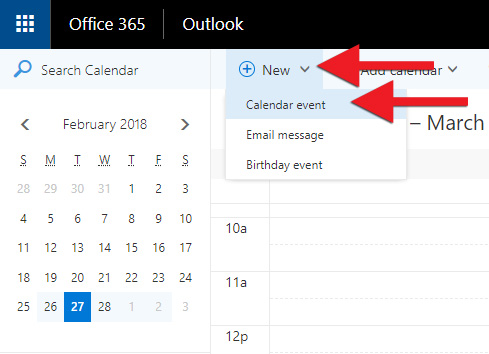
2) Give the meeting a title and select the time and date before you choose the meeting room. Then click on "Add a location or room":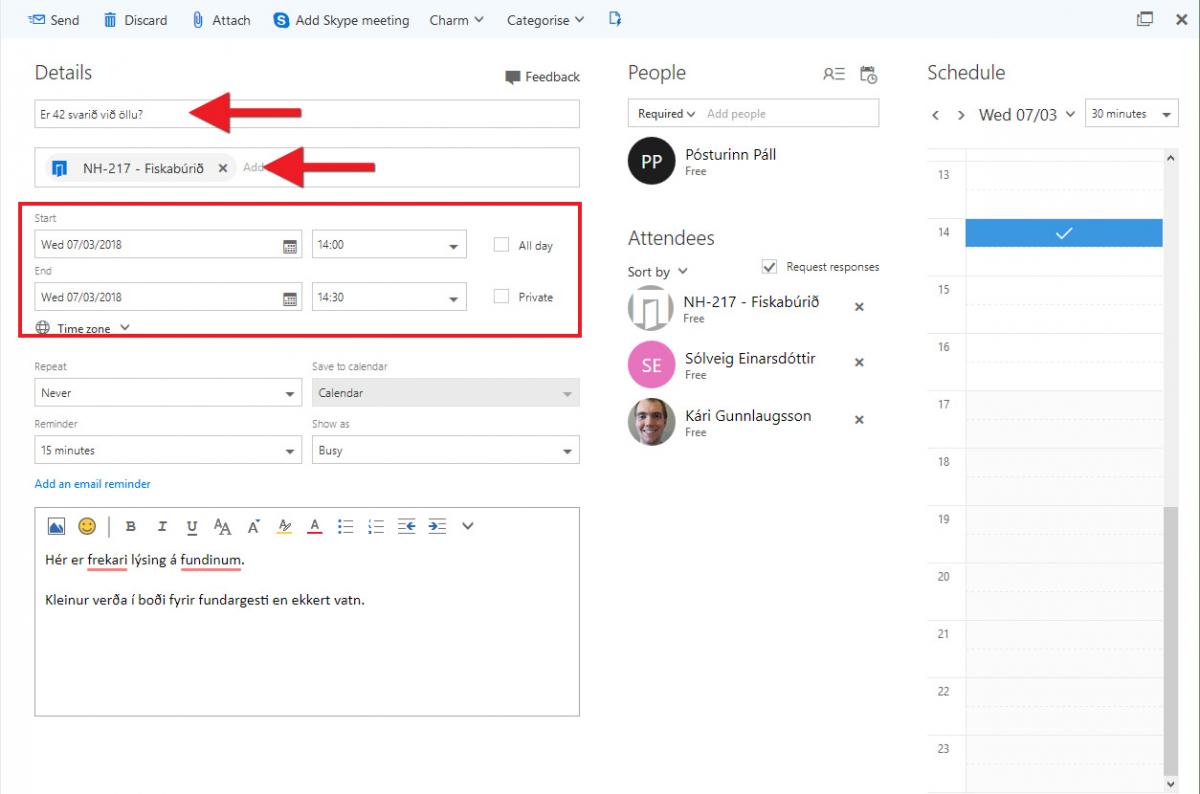
3) Clicking on "Add a location or room" will open a list. Start typing in the field to narrow down the list. You can choose to see only those rooms that are free at the selected time, "Available rooms" or to see "All rooms". Click on the room you want to book: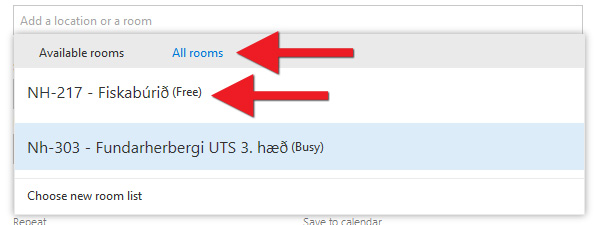
N.B. If you want to use the Scheduling Assistant to see whether the room and attendees are free, click here to continue: Scheduling Assistant – On the web
4) Now you can add attendees to the meeting. Under "People" you can choose whether those invited are "Required" to attend the meeting or whether their presence is "Optional". Start typing the name in the field to narrow down the list. If nobody comes up, click on "Search Directory". You can select a contact list if you have one set up. Then click on a person to add them to the list of those invited to the meeting. Check "Request responses" to require those invited to give notice of whether or not they will attend. At the top of the list you can see the meeting room: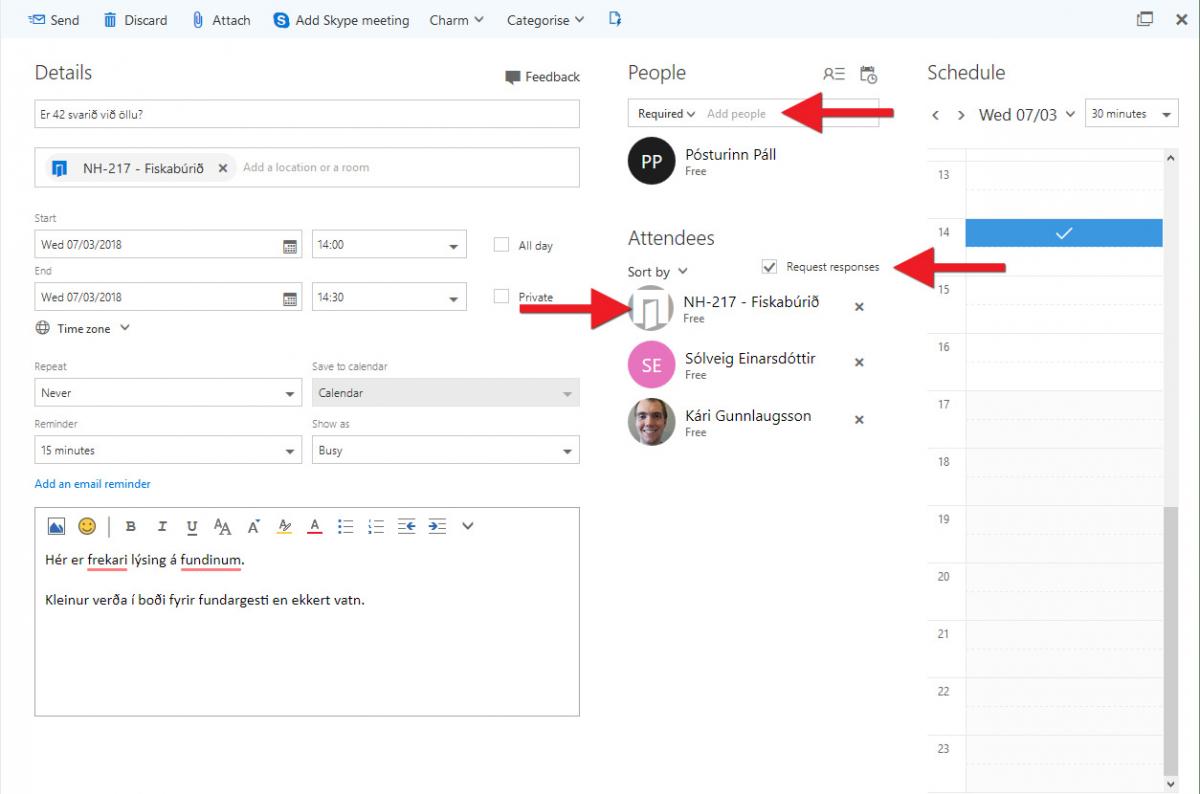
5) Add a description, such as the topic of the meeting, and then send the meeting request by clicking "Send":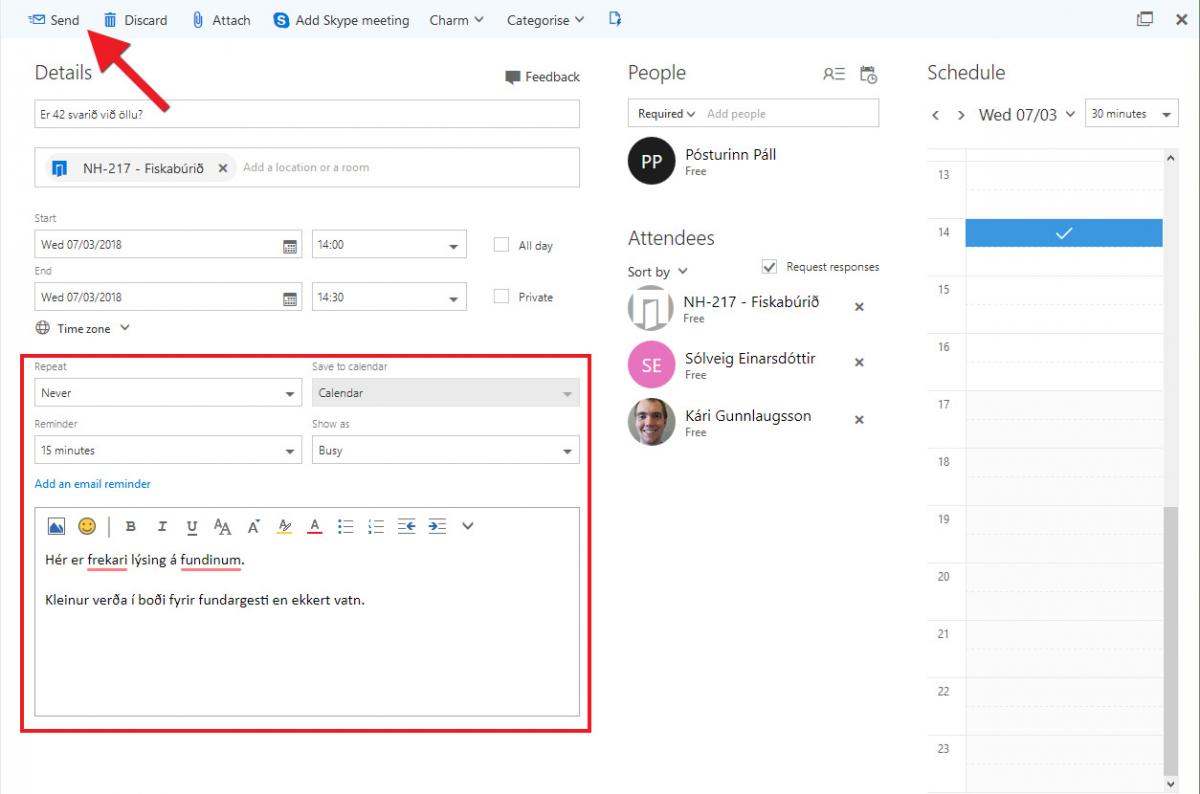
Now all attendees have received an invitation to the meeting, in their inboxes and Calendars.

