1) Open "Network and Sharing Center". You can do that by right-clicking on the network icon at the bottom right corner of the taskbar: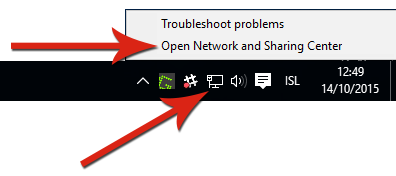
2) Click "Change adapter settings" on the left side of Network and Sharing Center: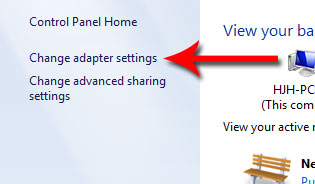
3) Right click "Ethernet" or "Local Area Connection" and choose "Properties":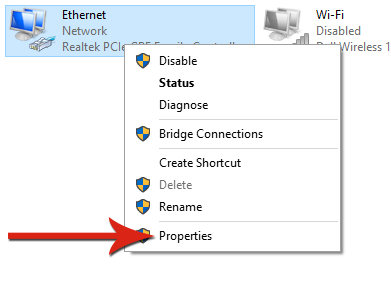
4) Click "Internet Protocol Version 4" and then "Properties":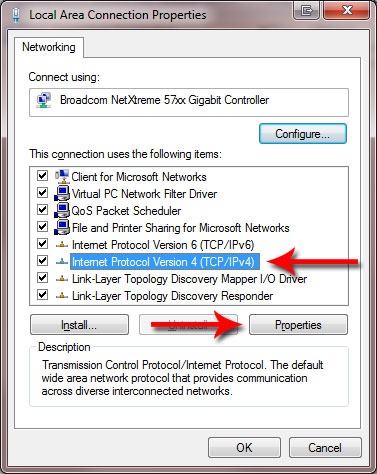
5) Make sure "Obtain an IP address automatically" and "Obtain DNS server address automatically" are selected: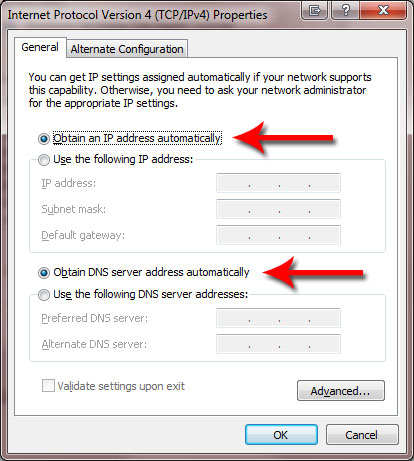
6) Click OK and OK again, now the net card should be ready for receiving an IP address from Division of IT.

